


MalcoEdge® Turboflow™ Vacuum Kit – HHK1
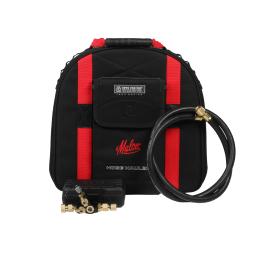
The MalcoEdge® Turboflow™ Vacuum Kit (HHK1) is built to support fast, efficient evacuation of residential HVAC and refrigeration systems. Designed for Trade Pros who prioritize performance and workflow, this kit includes essential high-flow components in one organized, ready-to-use kit.
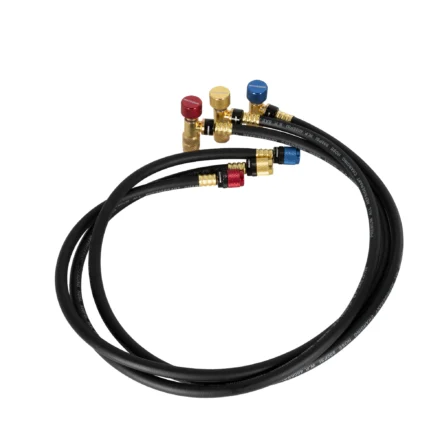
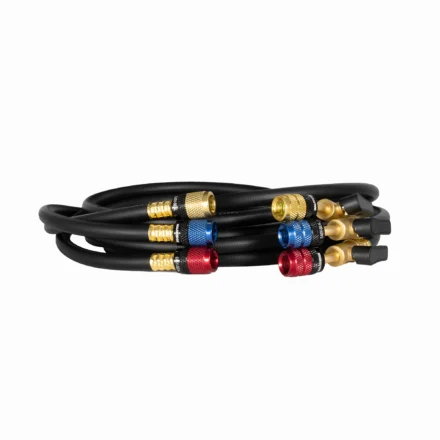
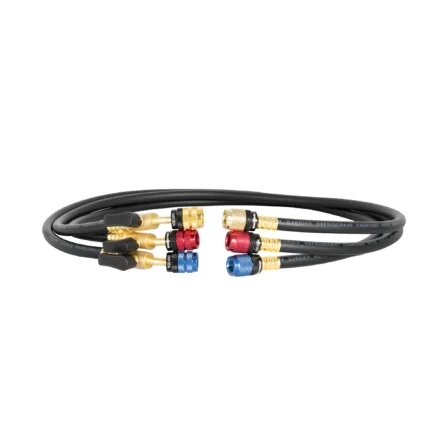
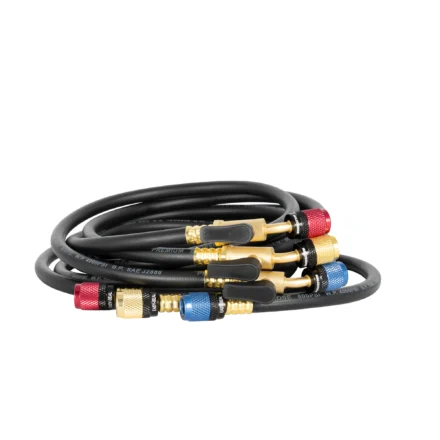
At the core of the kit is the TurboFlow™ refrigerant hose (RH6014), engineered with a 3/8 in. inner diameter to increase flow and reduce evacuation time. The 60 in. hose length provides flexibility on the job while maintaining manageable handling. Built to SAE J2196 standards, the hose delivers durability under demanding conditions with an 800 psi working pressure and 4000 psi burst rating. Integrated 3/8 in. x 1/4 in. SAE fittings ensure compatibility with standard service ports and manifold connections.
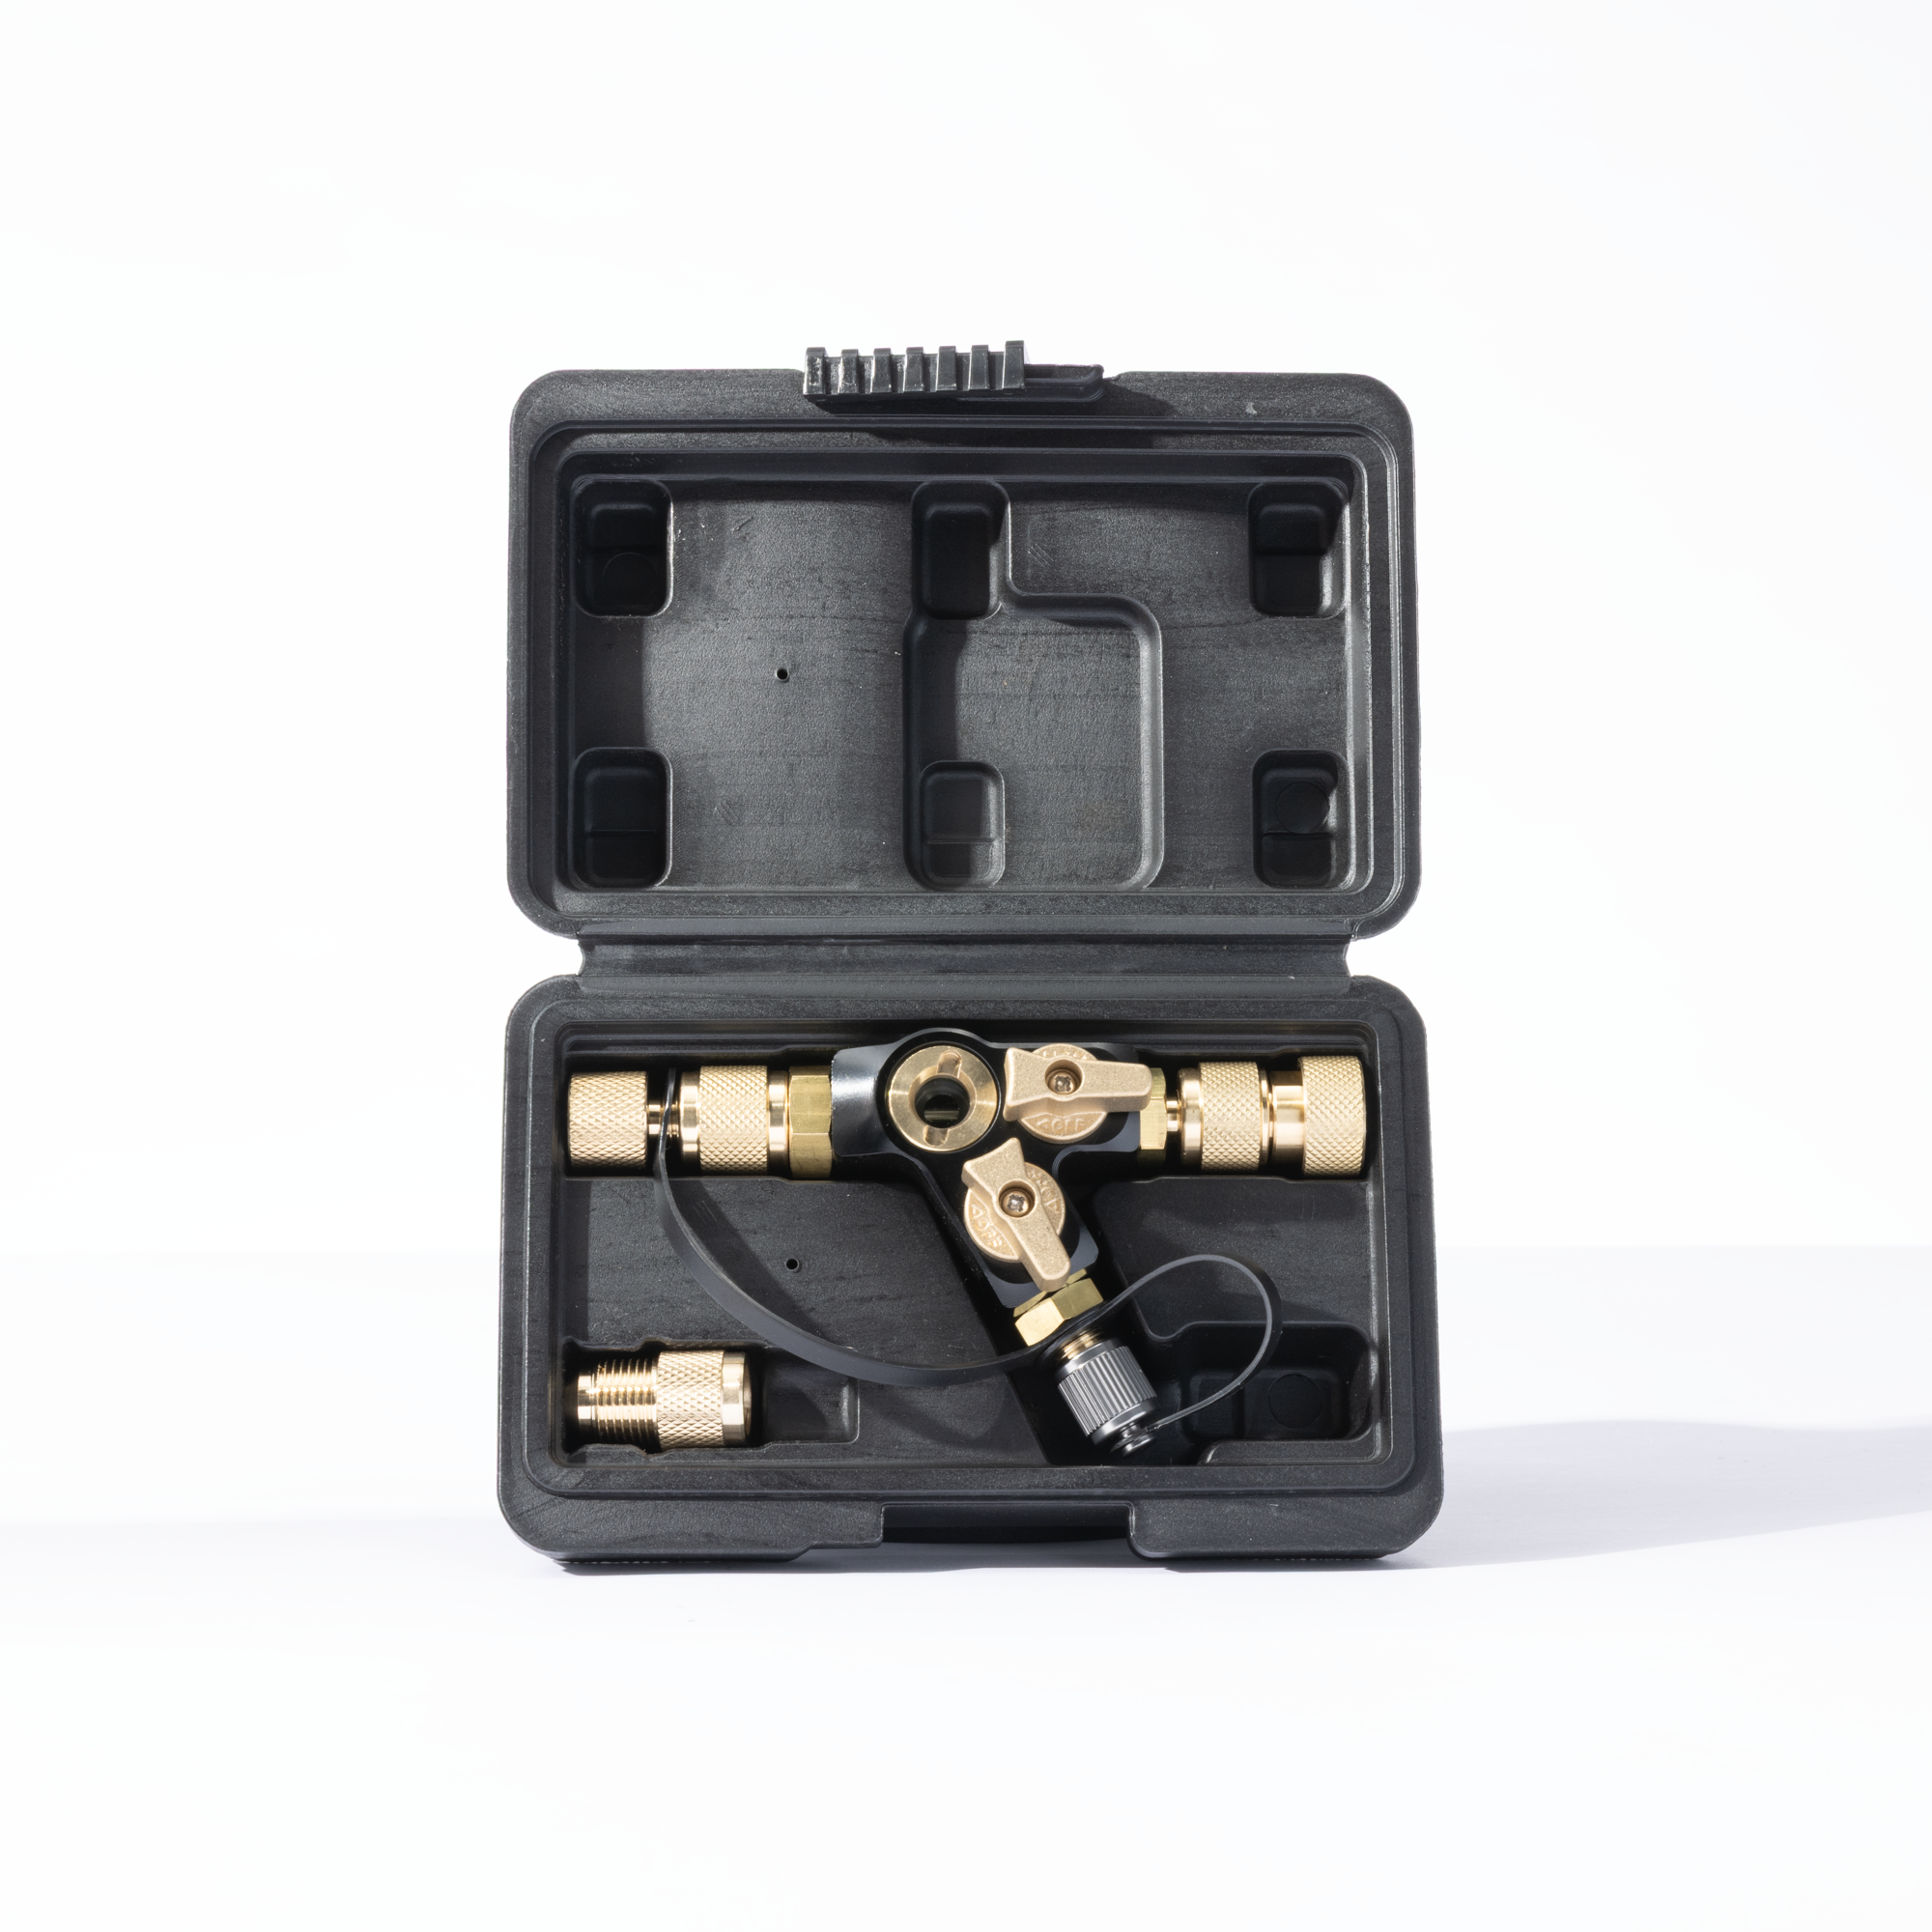
The included High-Flow Core Removal Tool Valve (CRT2Y) features a Y-shaped design that improves flow path efficiency compared to traditional 90-degree configurations. A built-in dual valve system allows technicians to isolate and protect connected vacuum gauges during service. The integrated sight glass provides clear visual confirmation of refrigerant condition and ensures the valve core is securely captured before removal. With a vacuum rating down to 20 microns and included adapters for 1/4 in. and 5/16 in. systems, the tool is designed for versatility across common HVAC applications. Durable construction includes an anodized aluminum body with brass valves and fittings for long-term reliability and a magnetic end knob for convenient storage of the core removal rod after removal from the tool body.
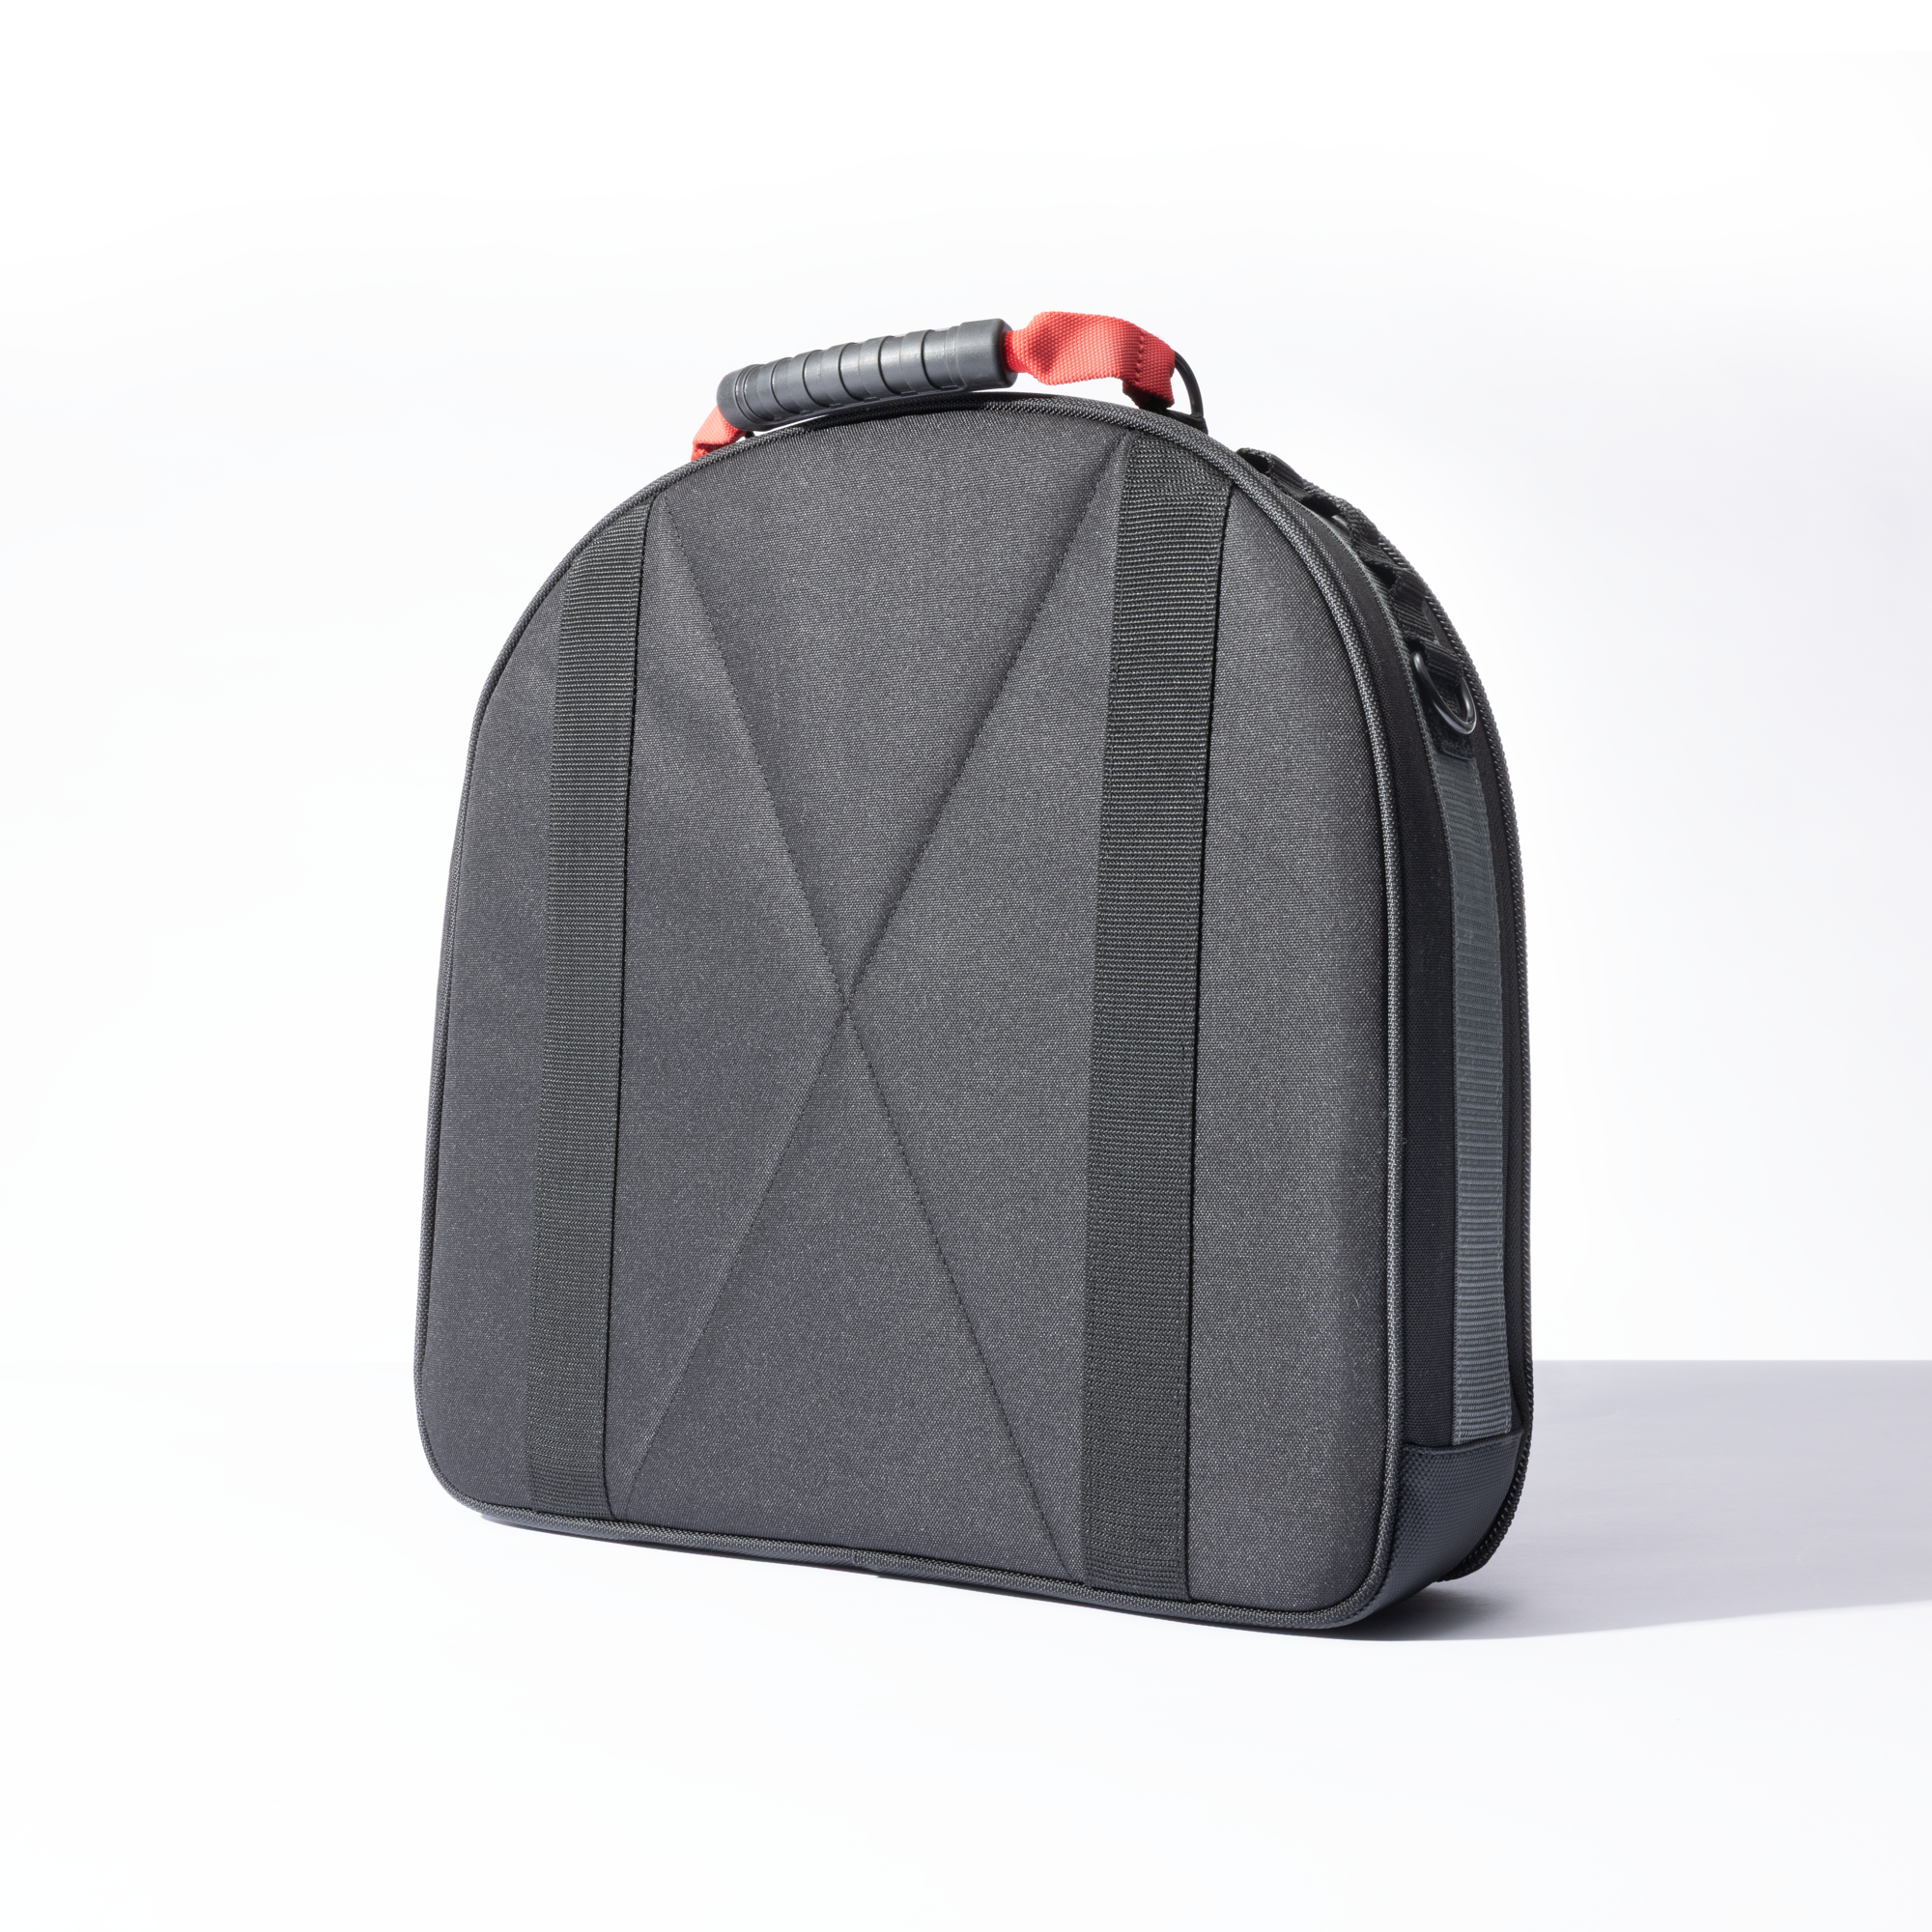
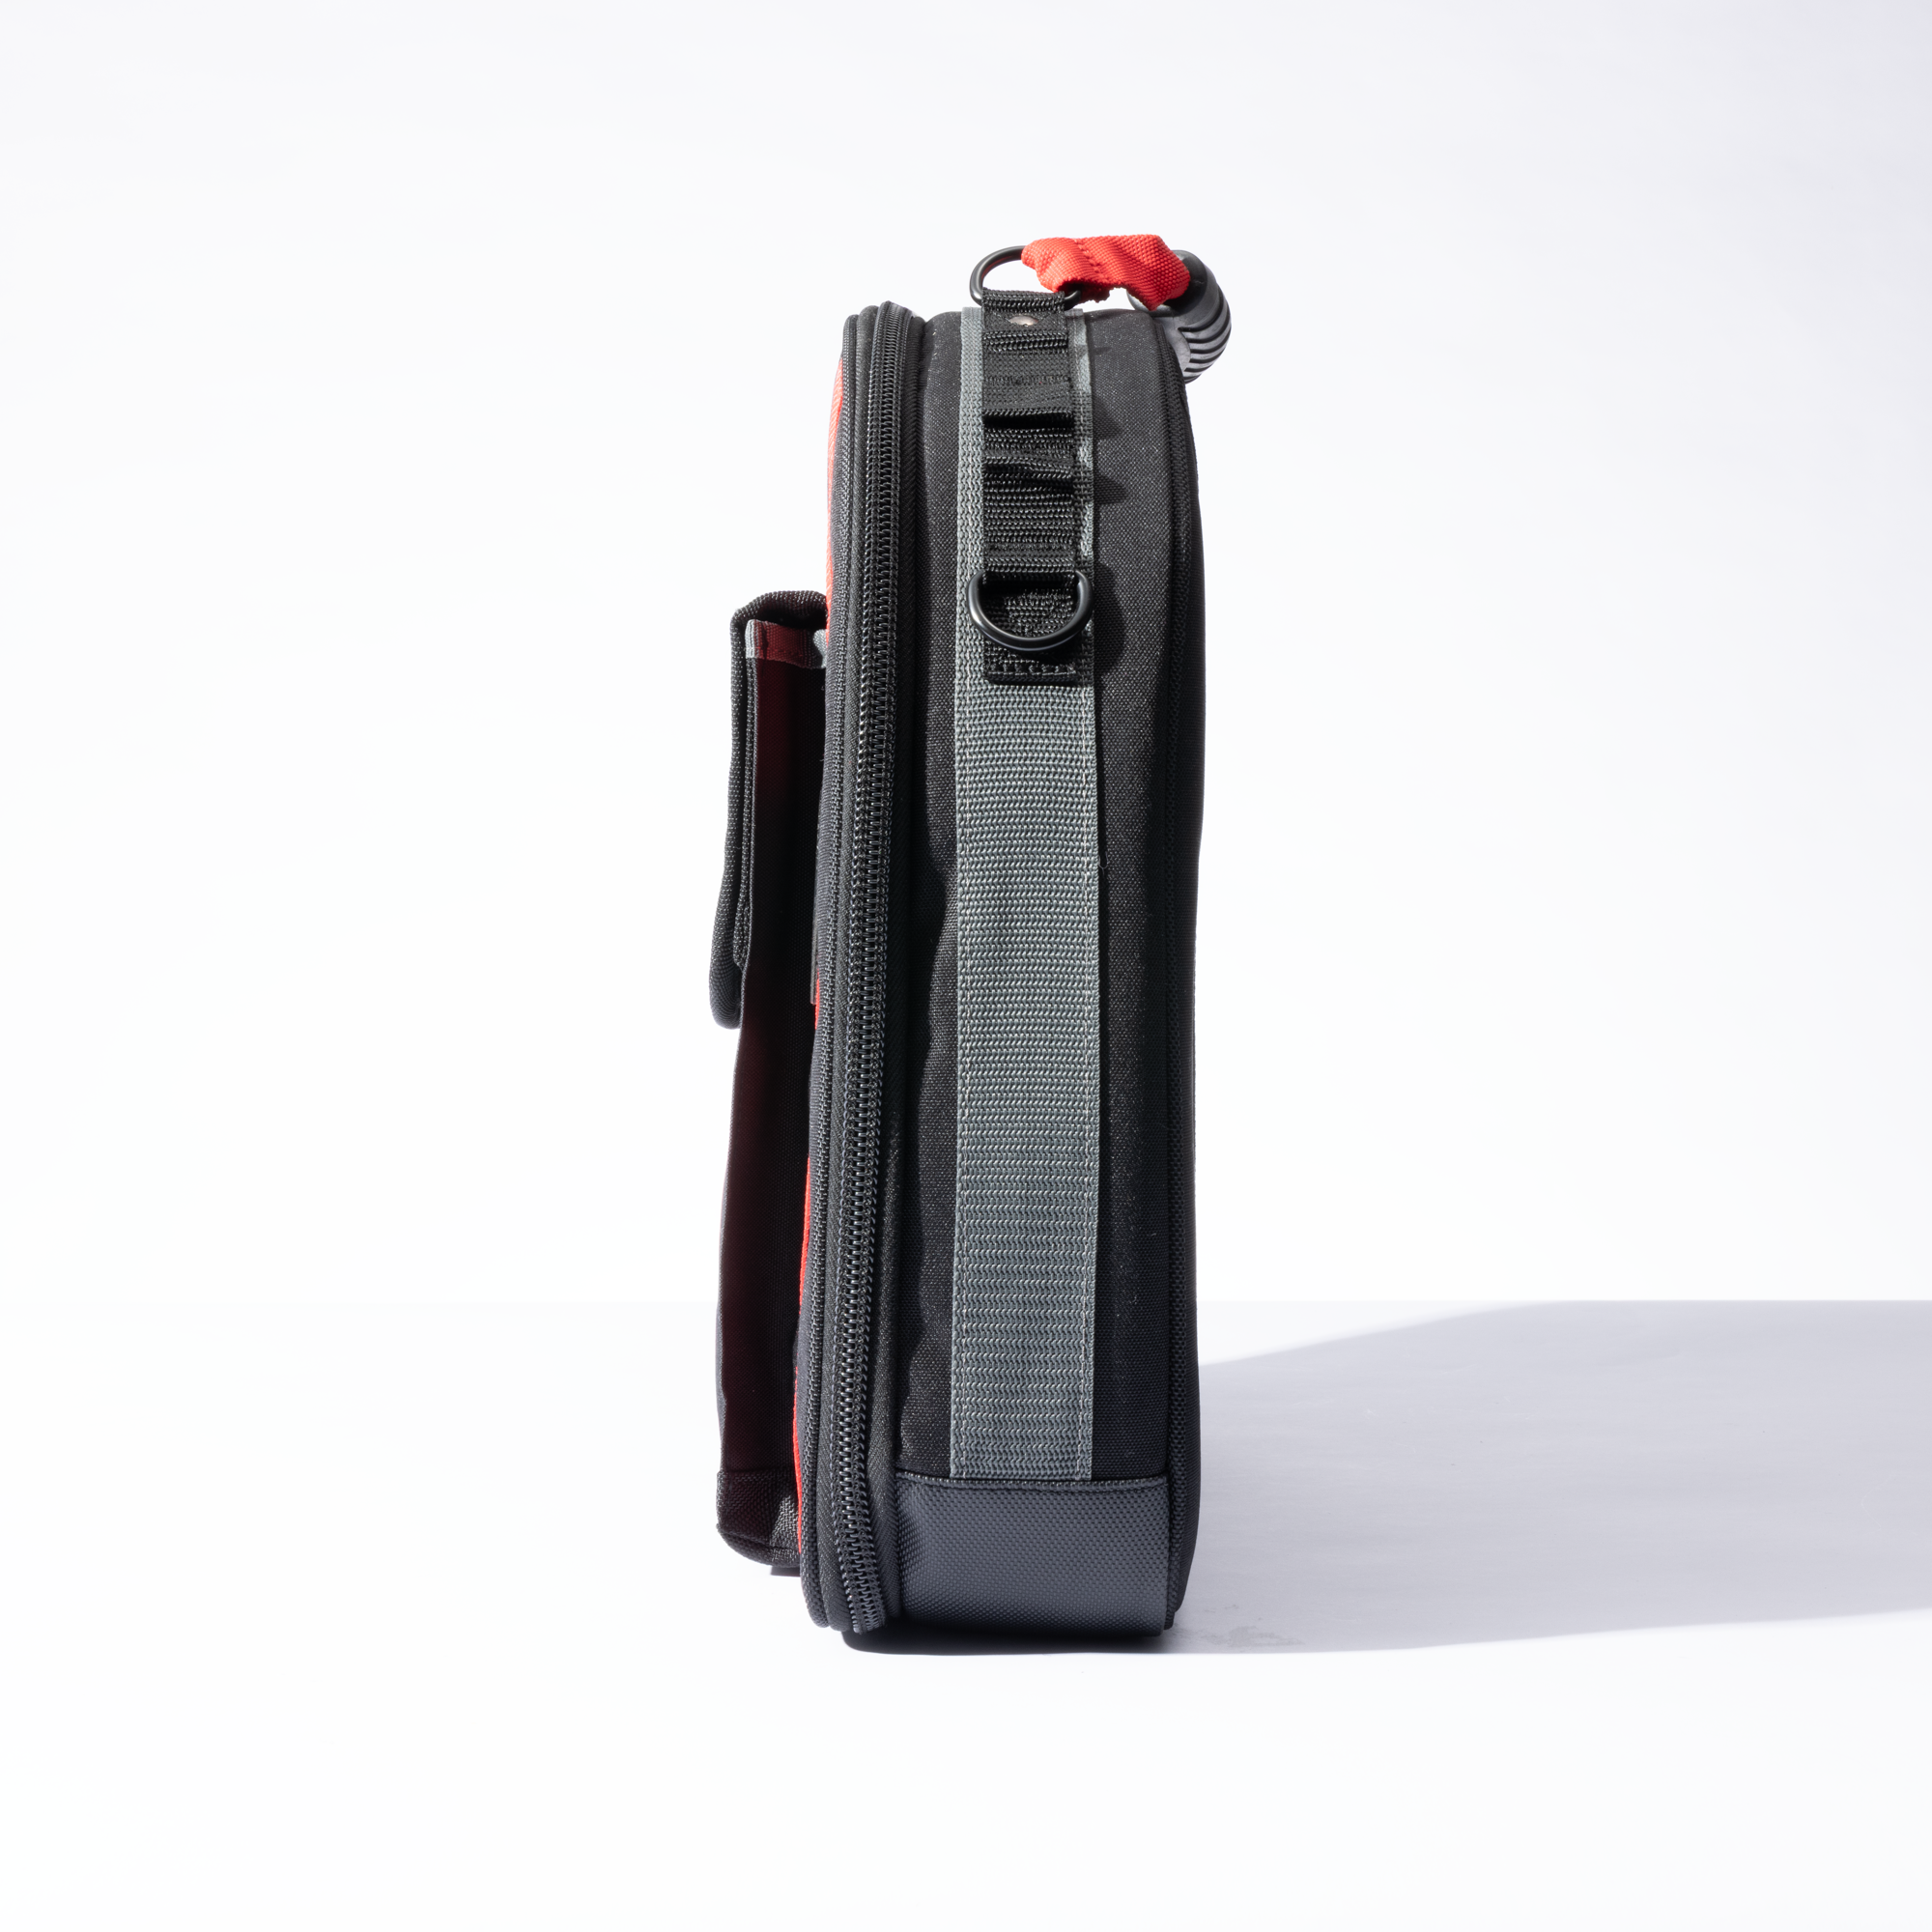
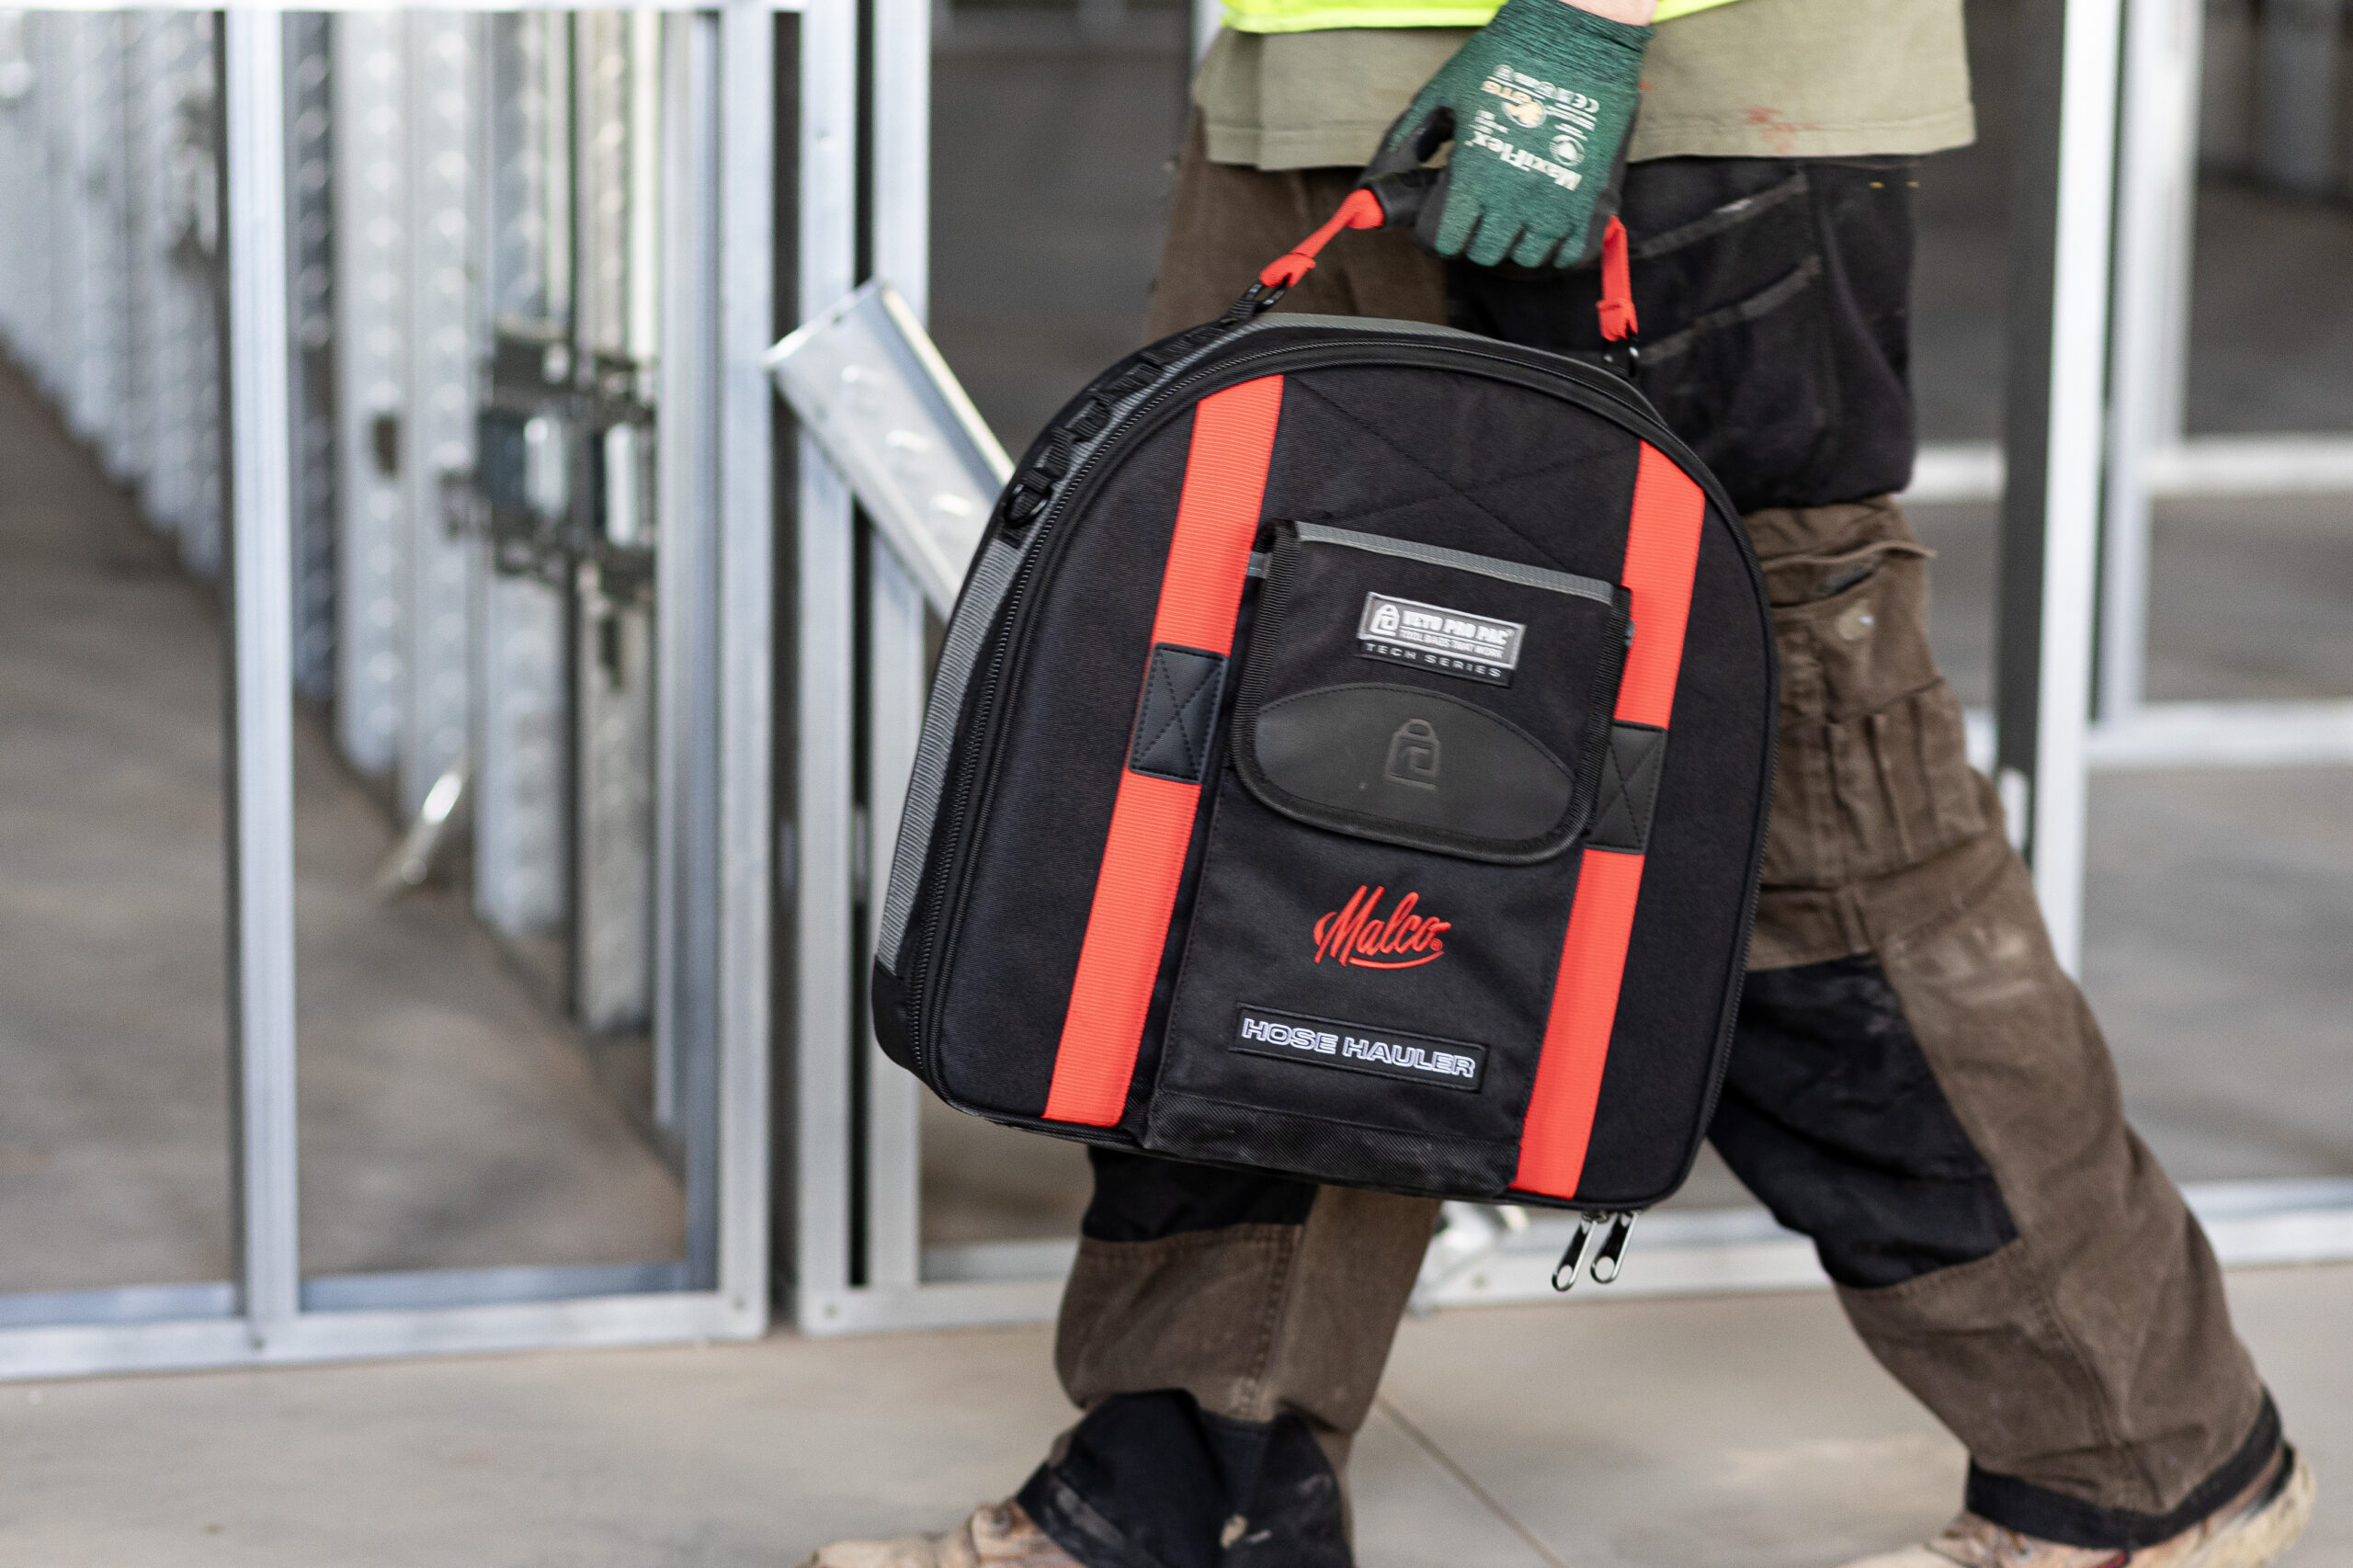
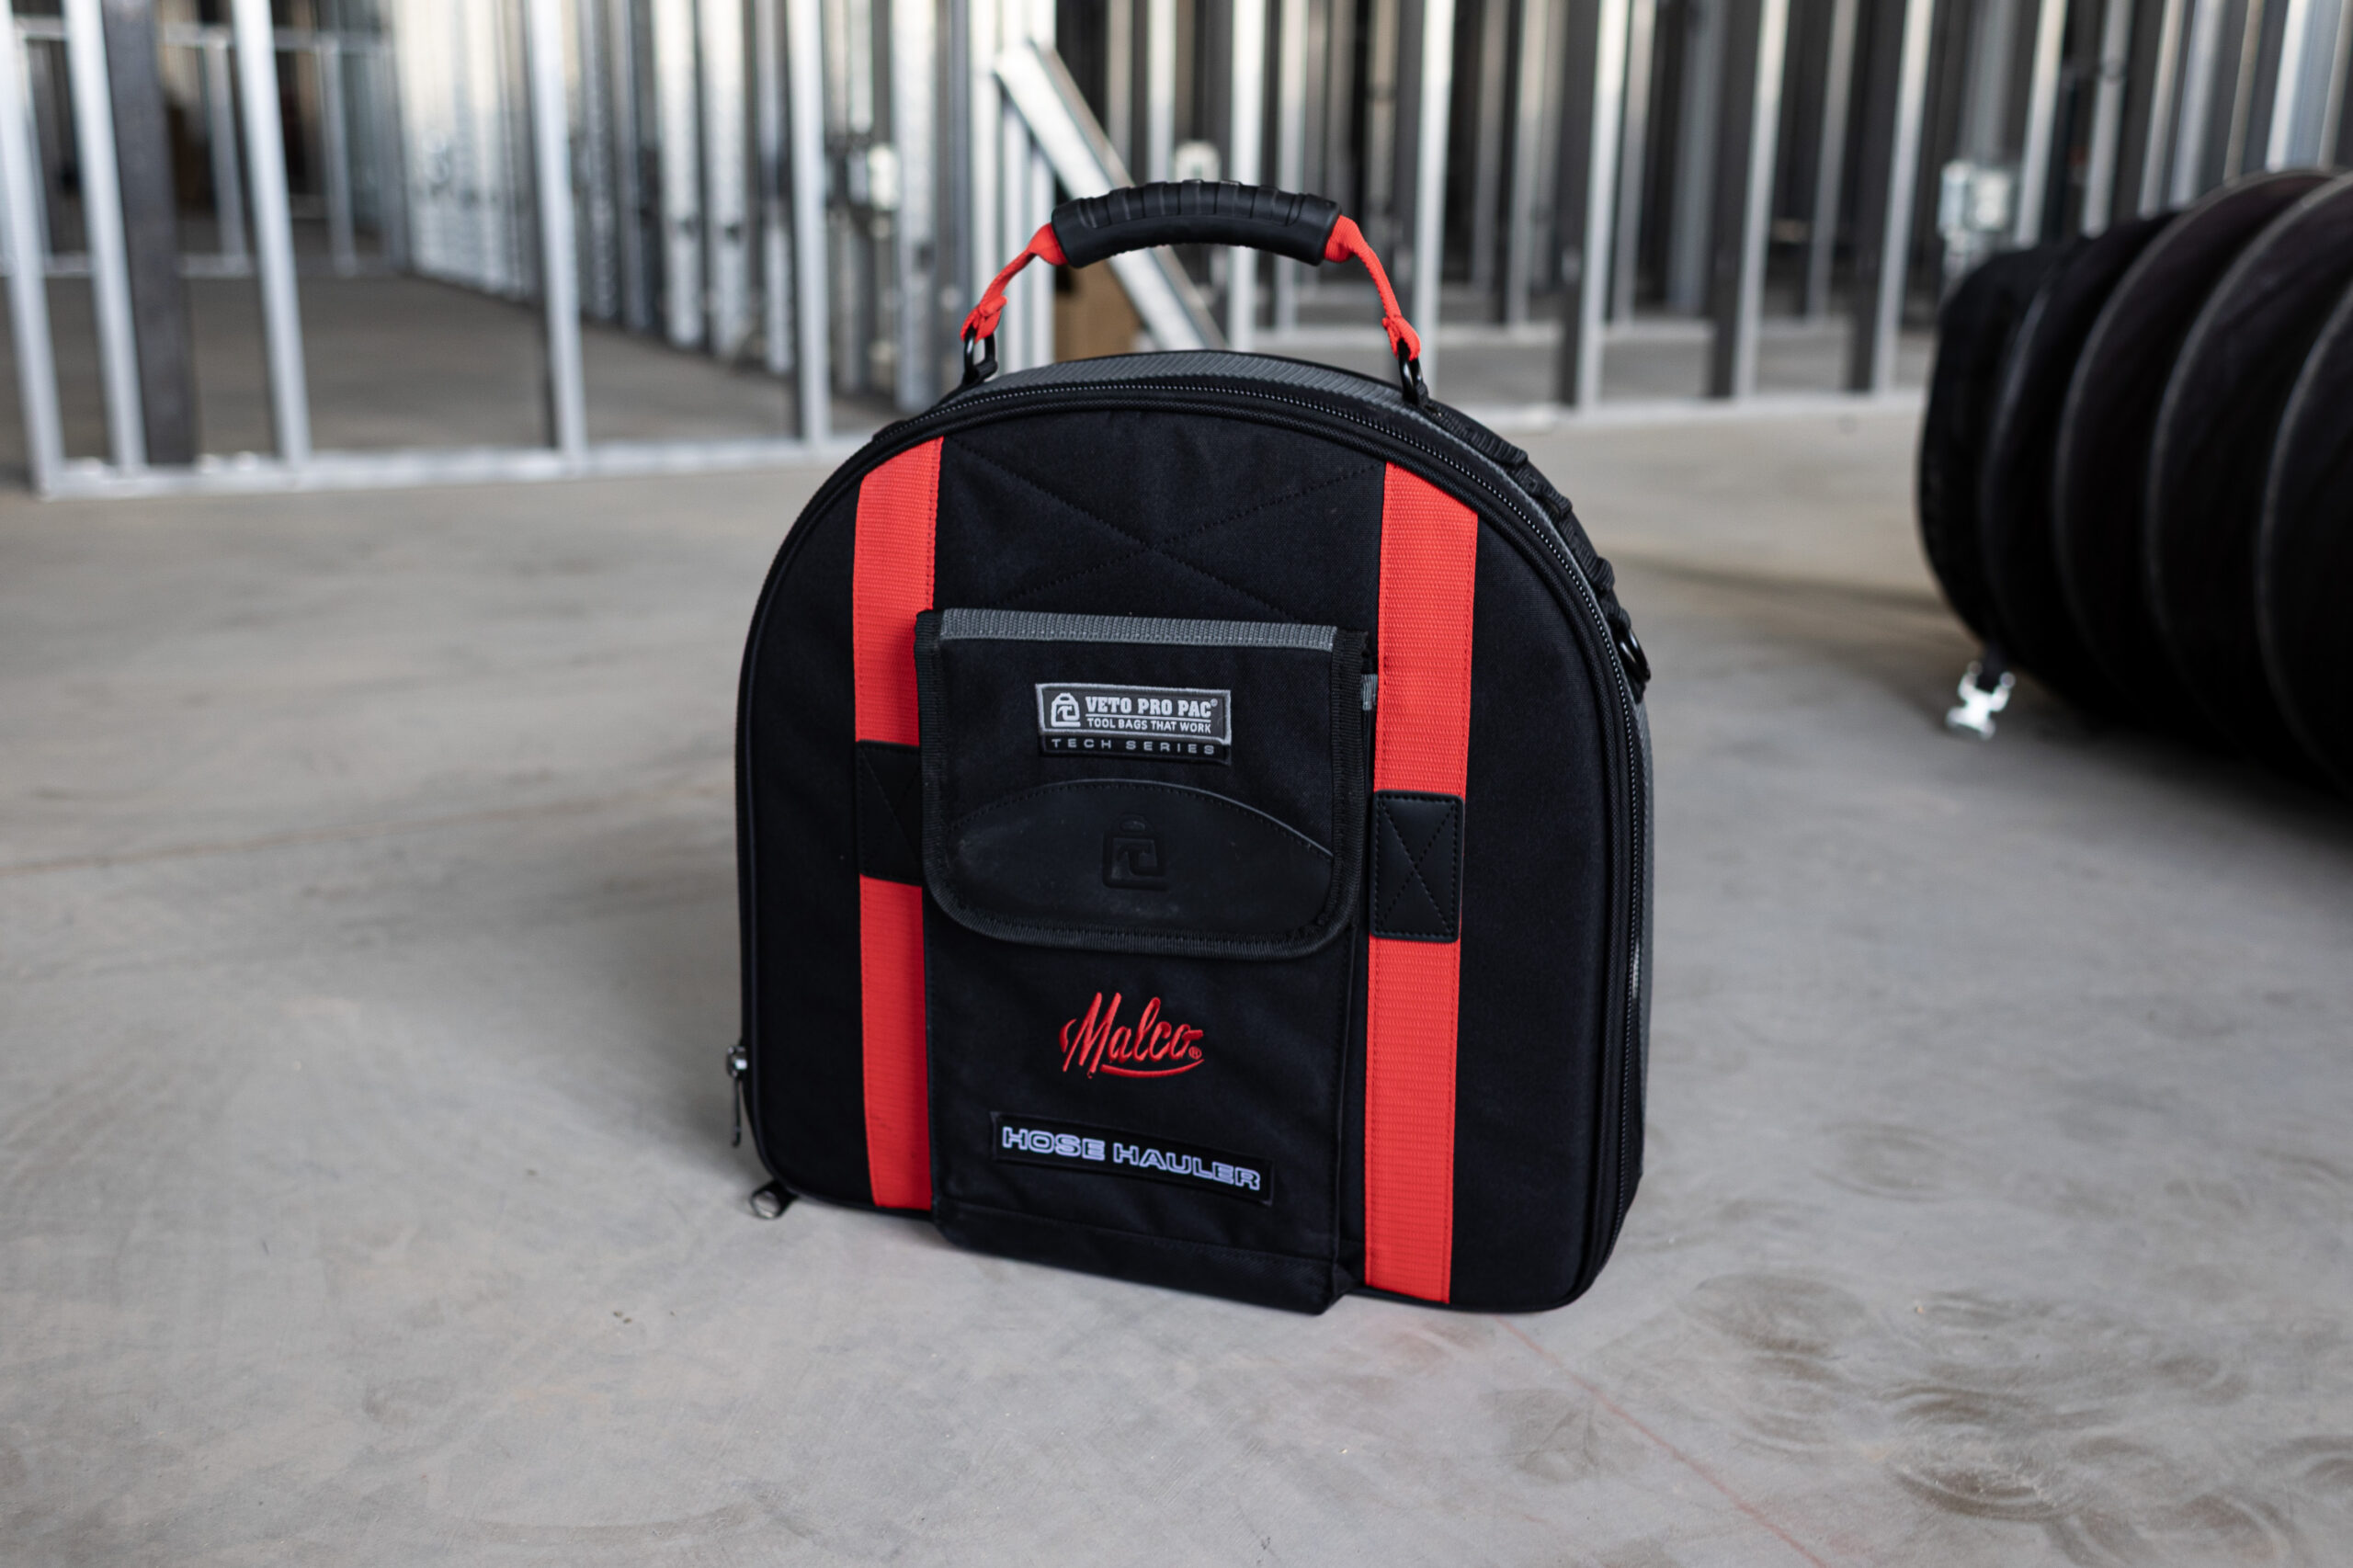
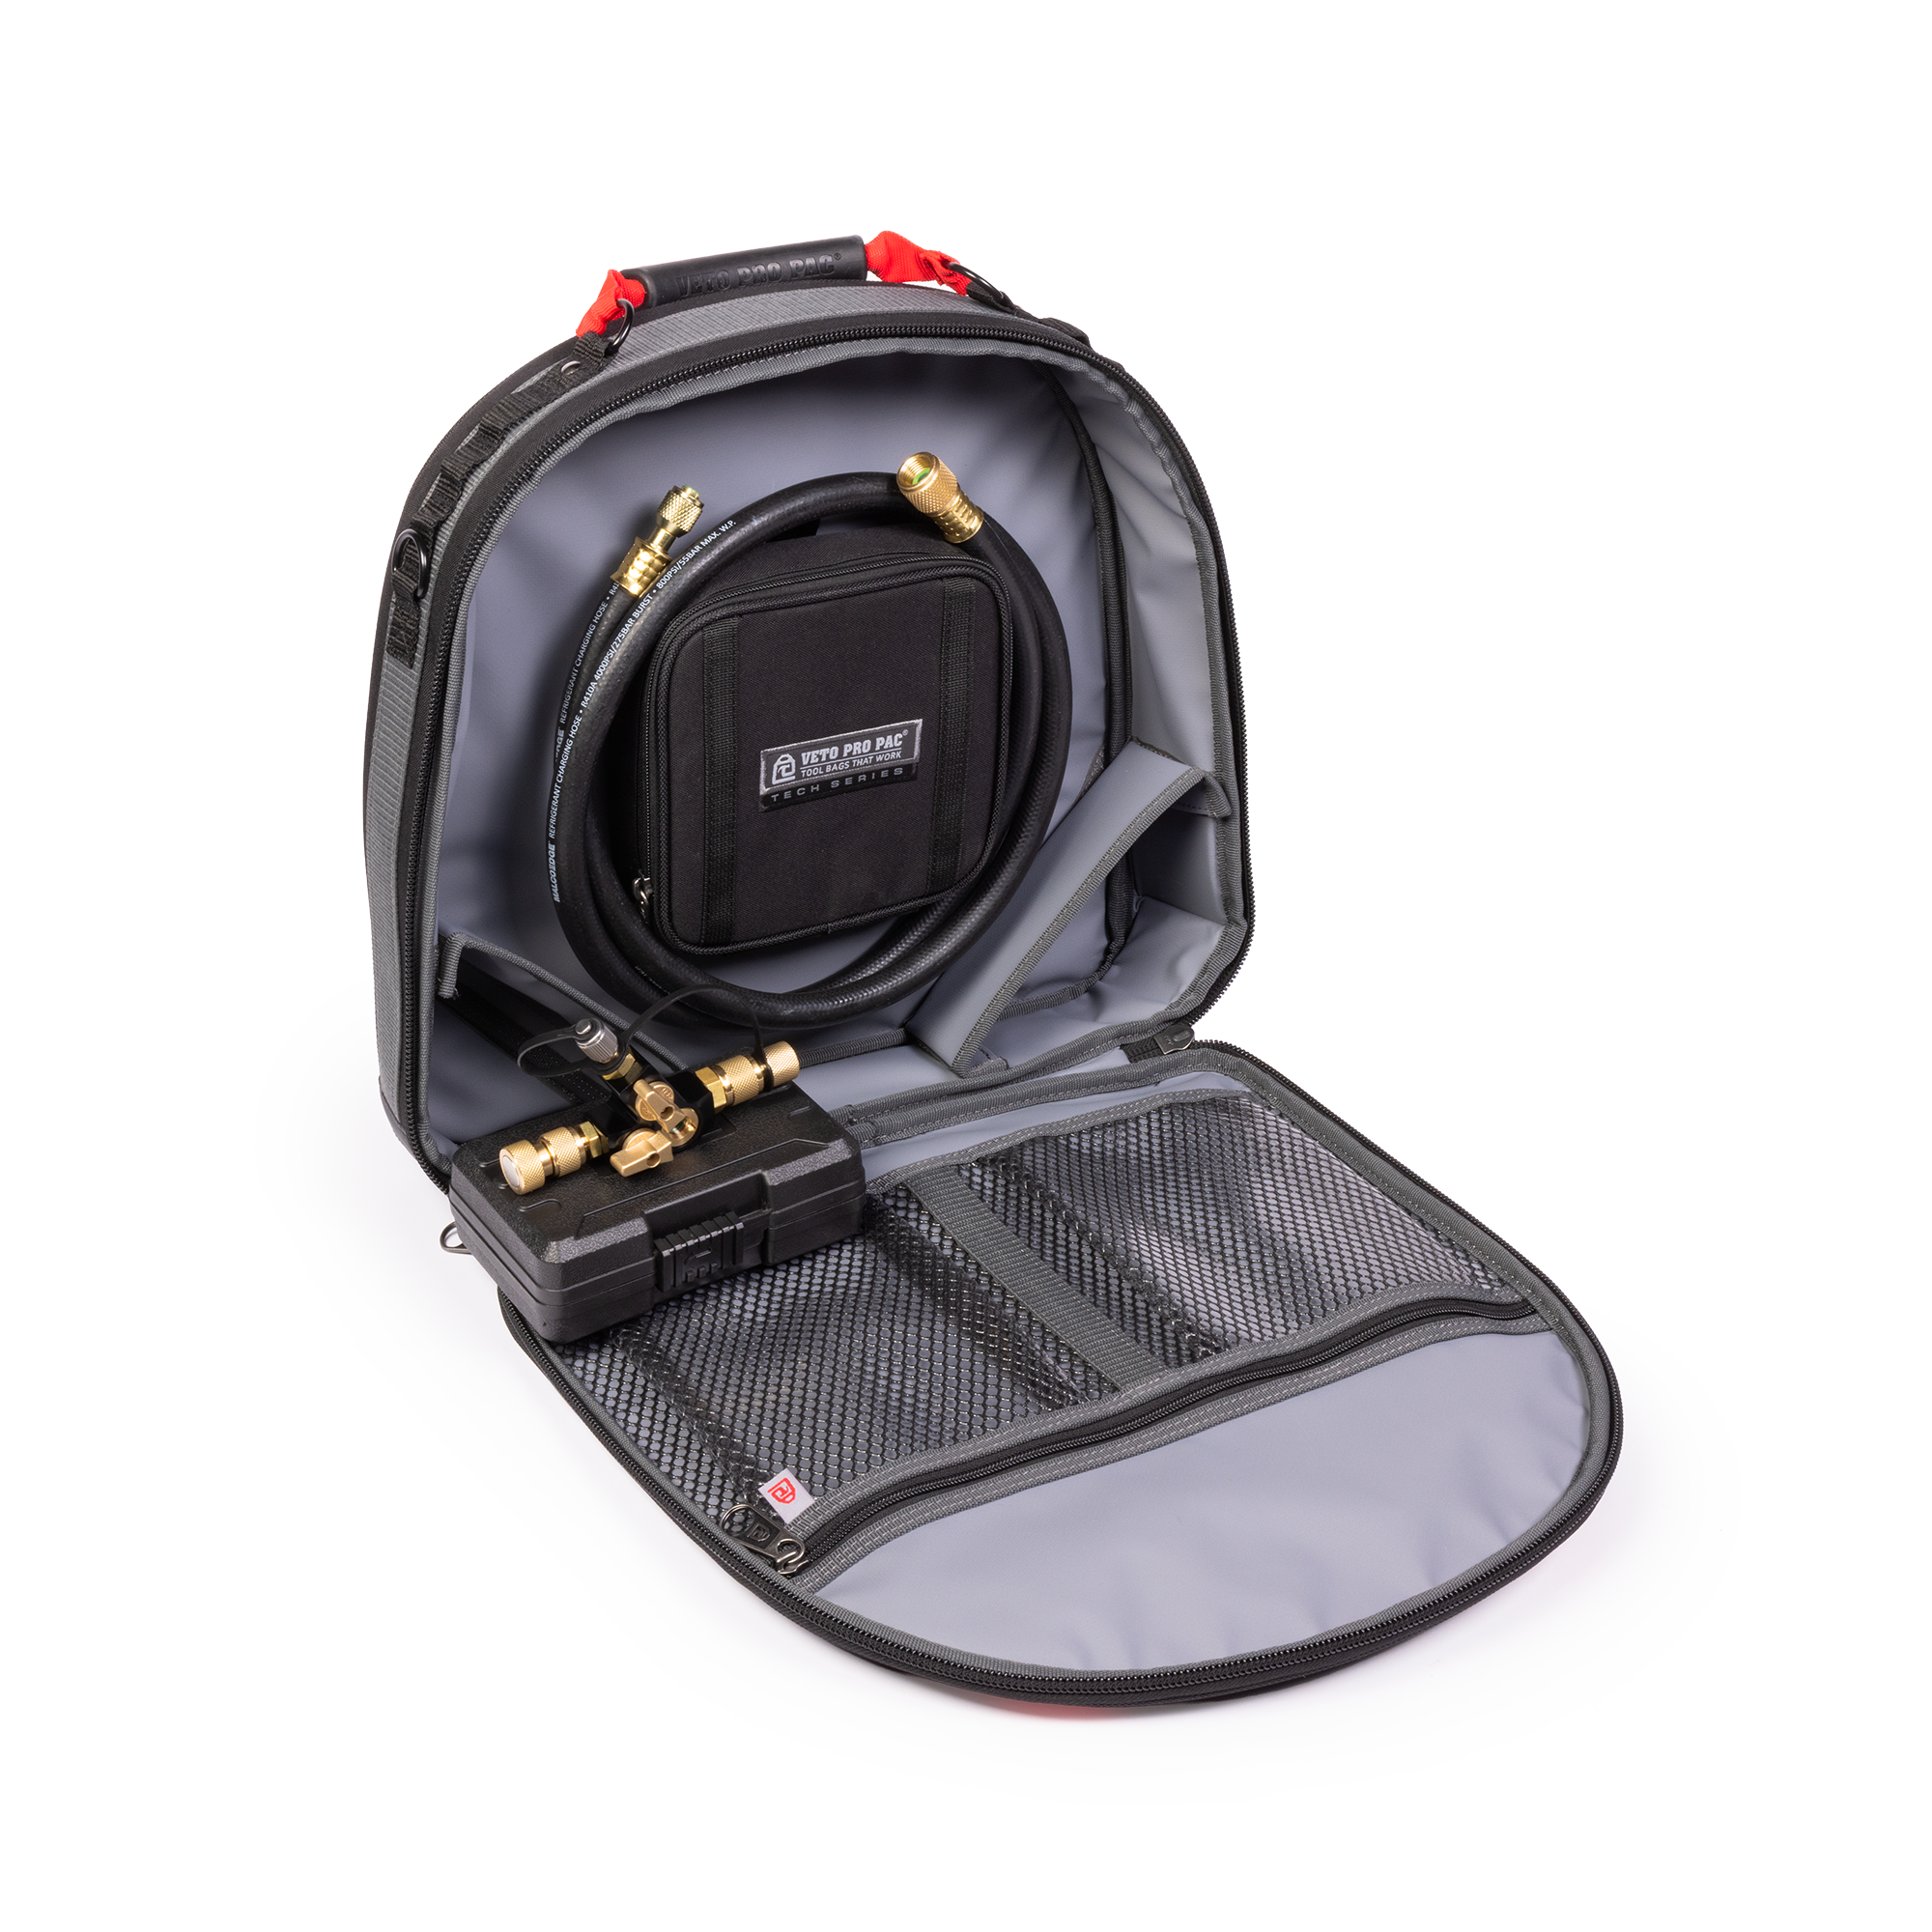
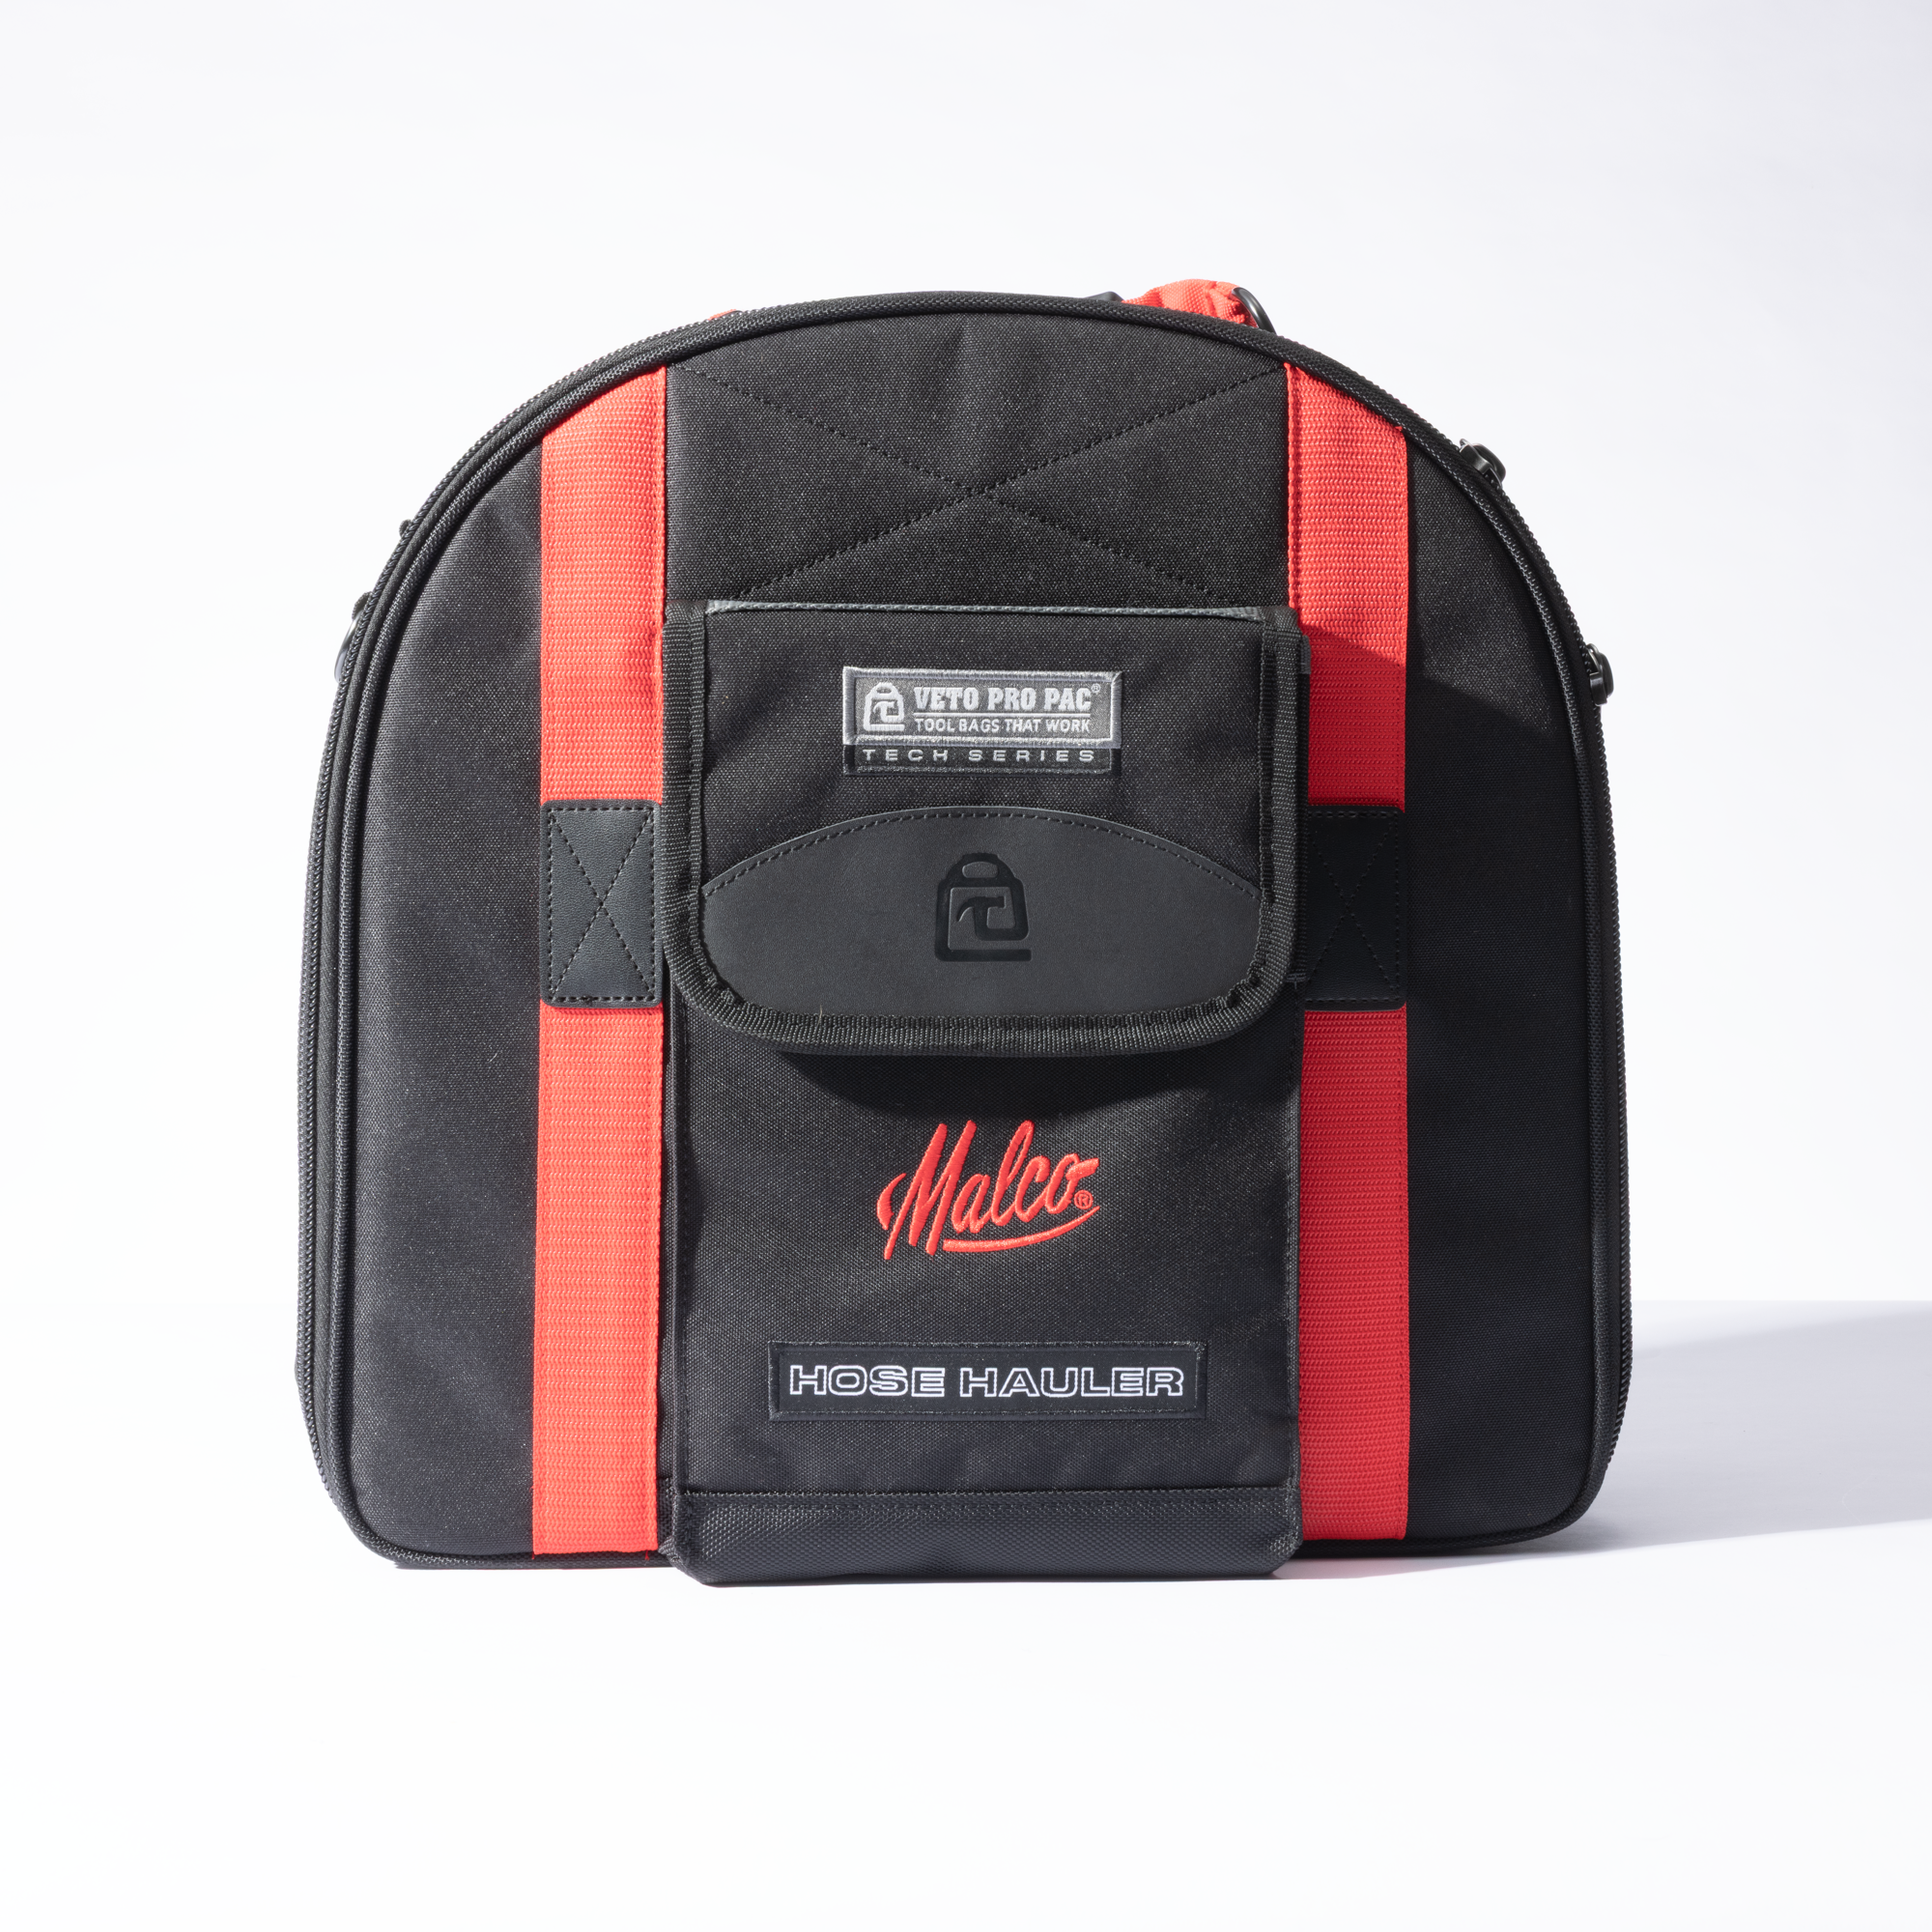
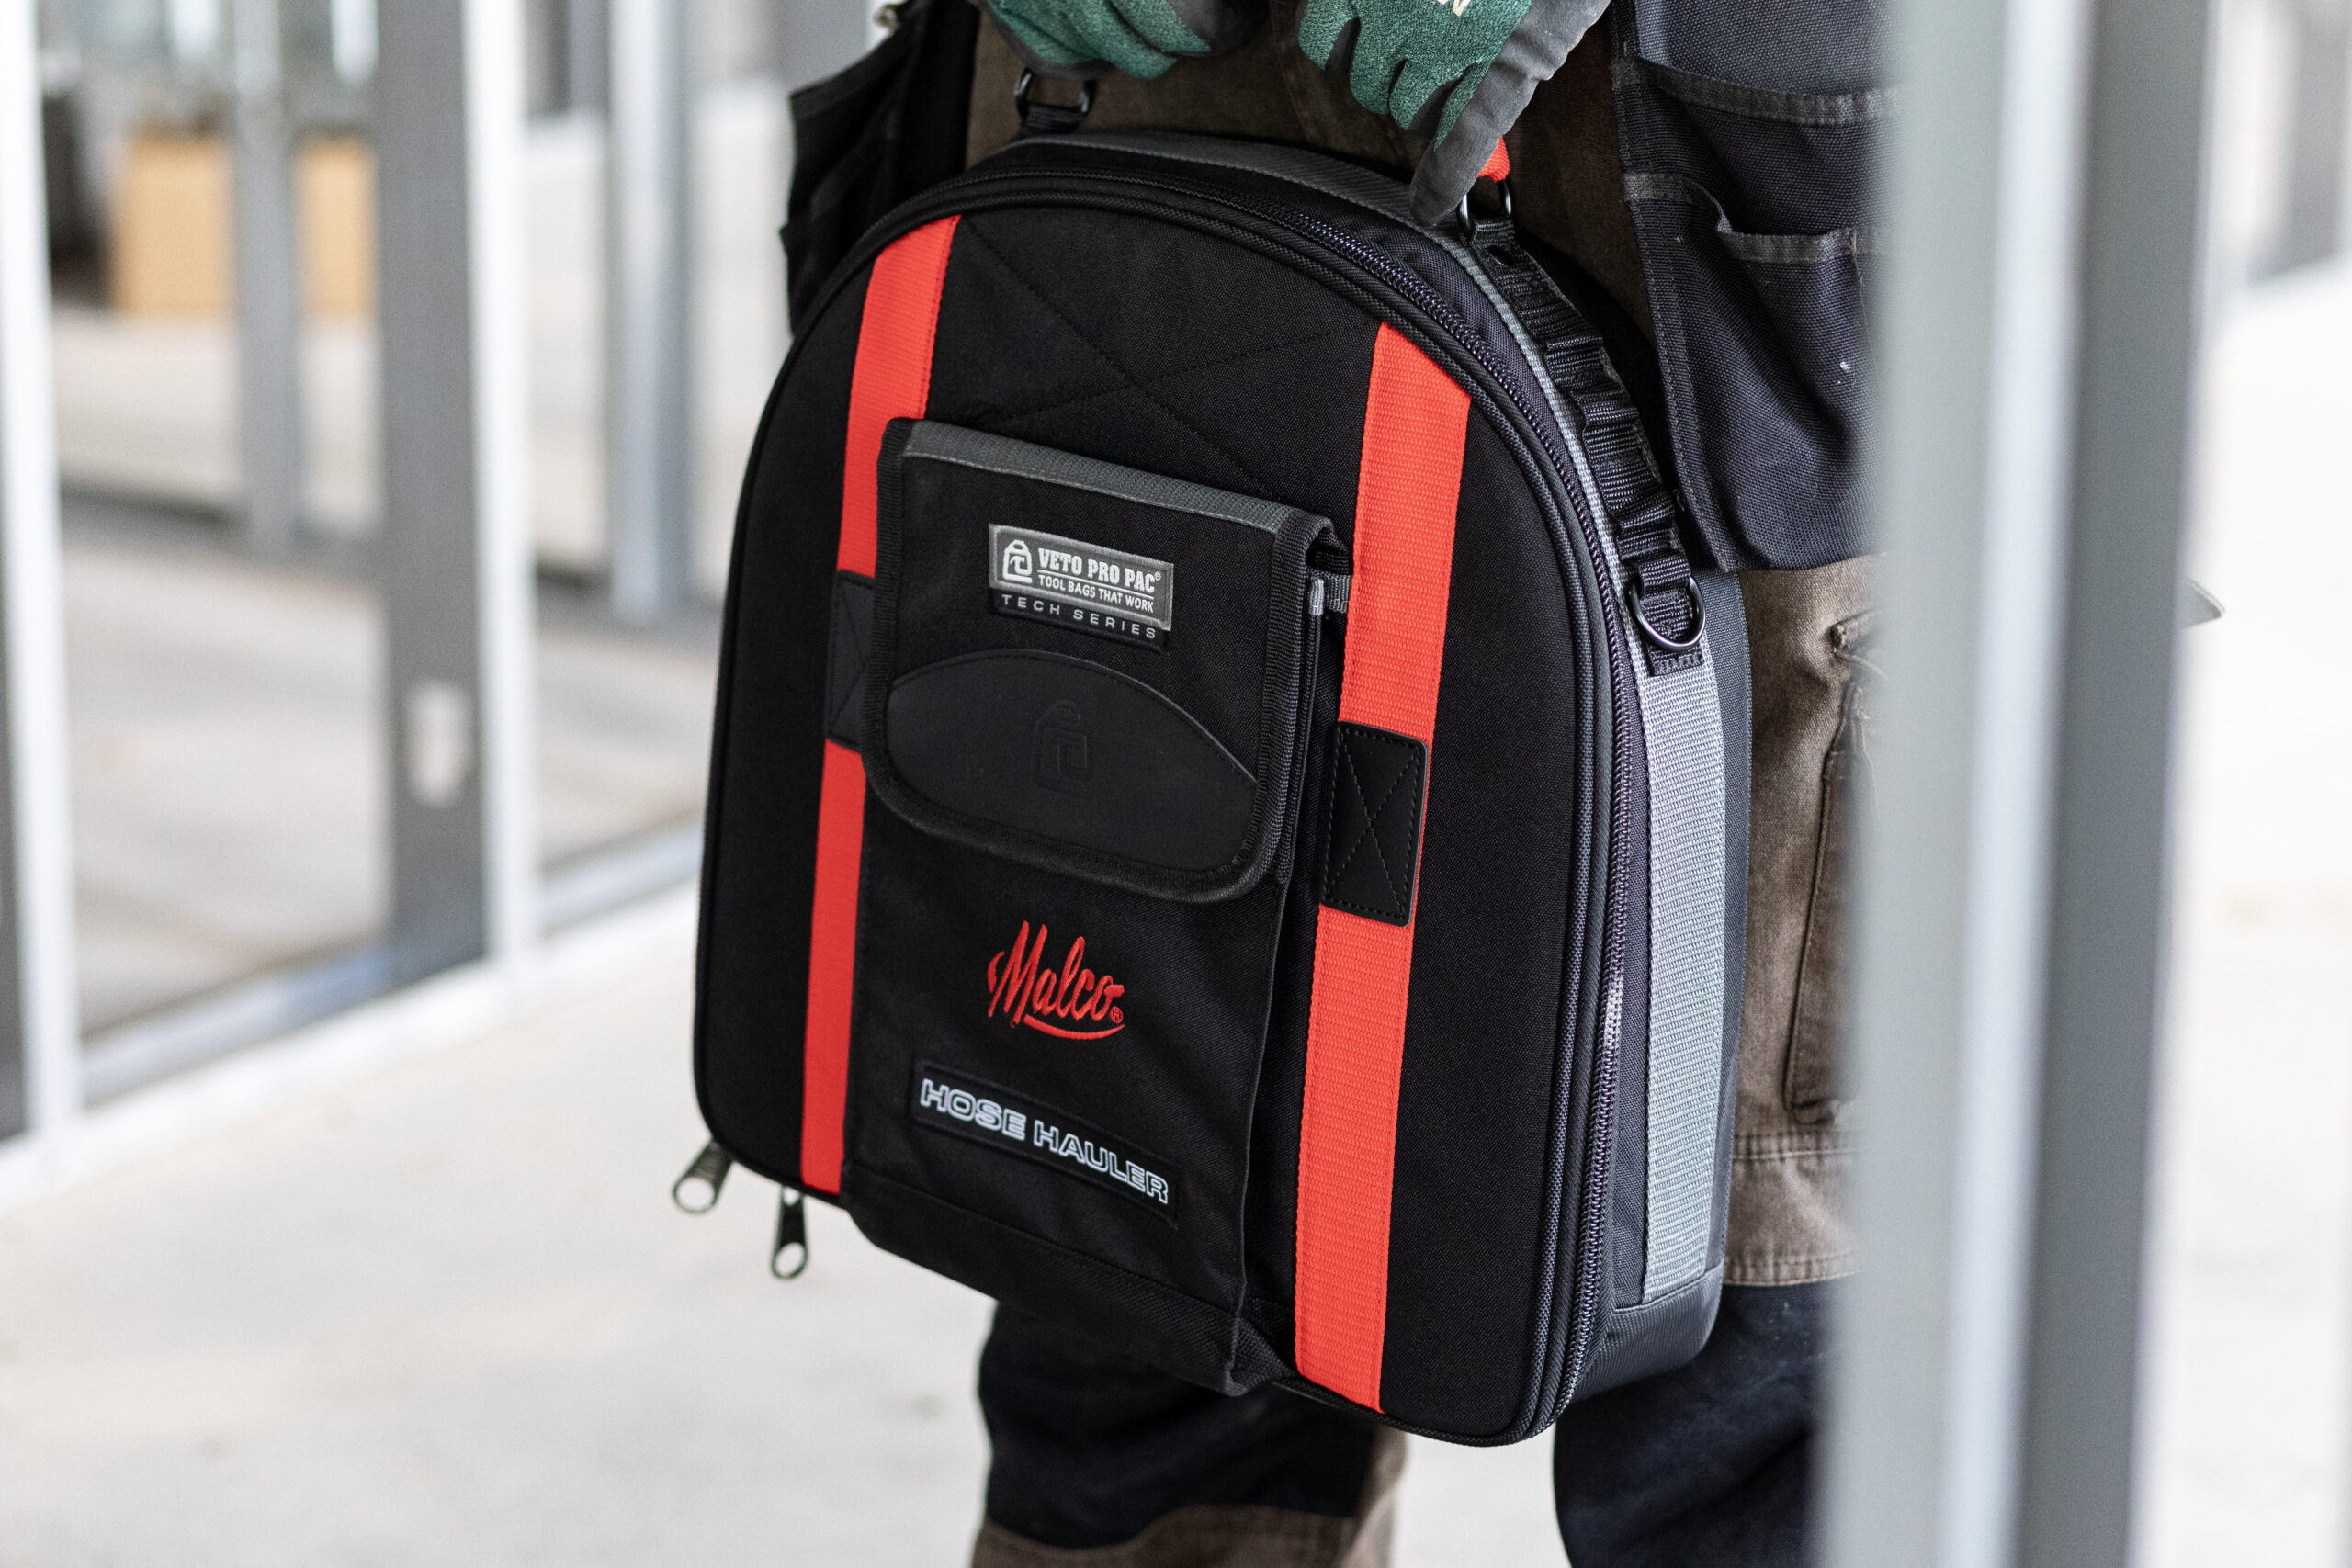
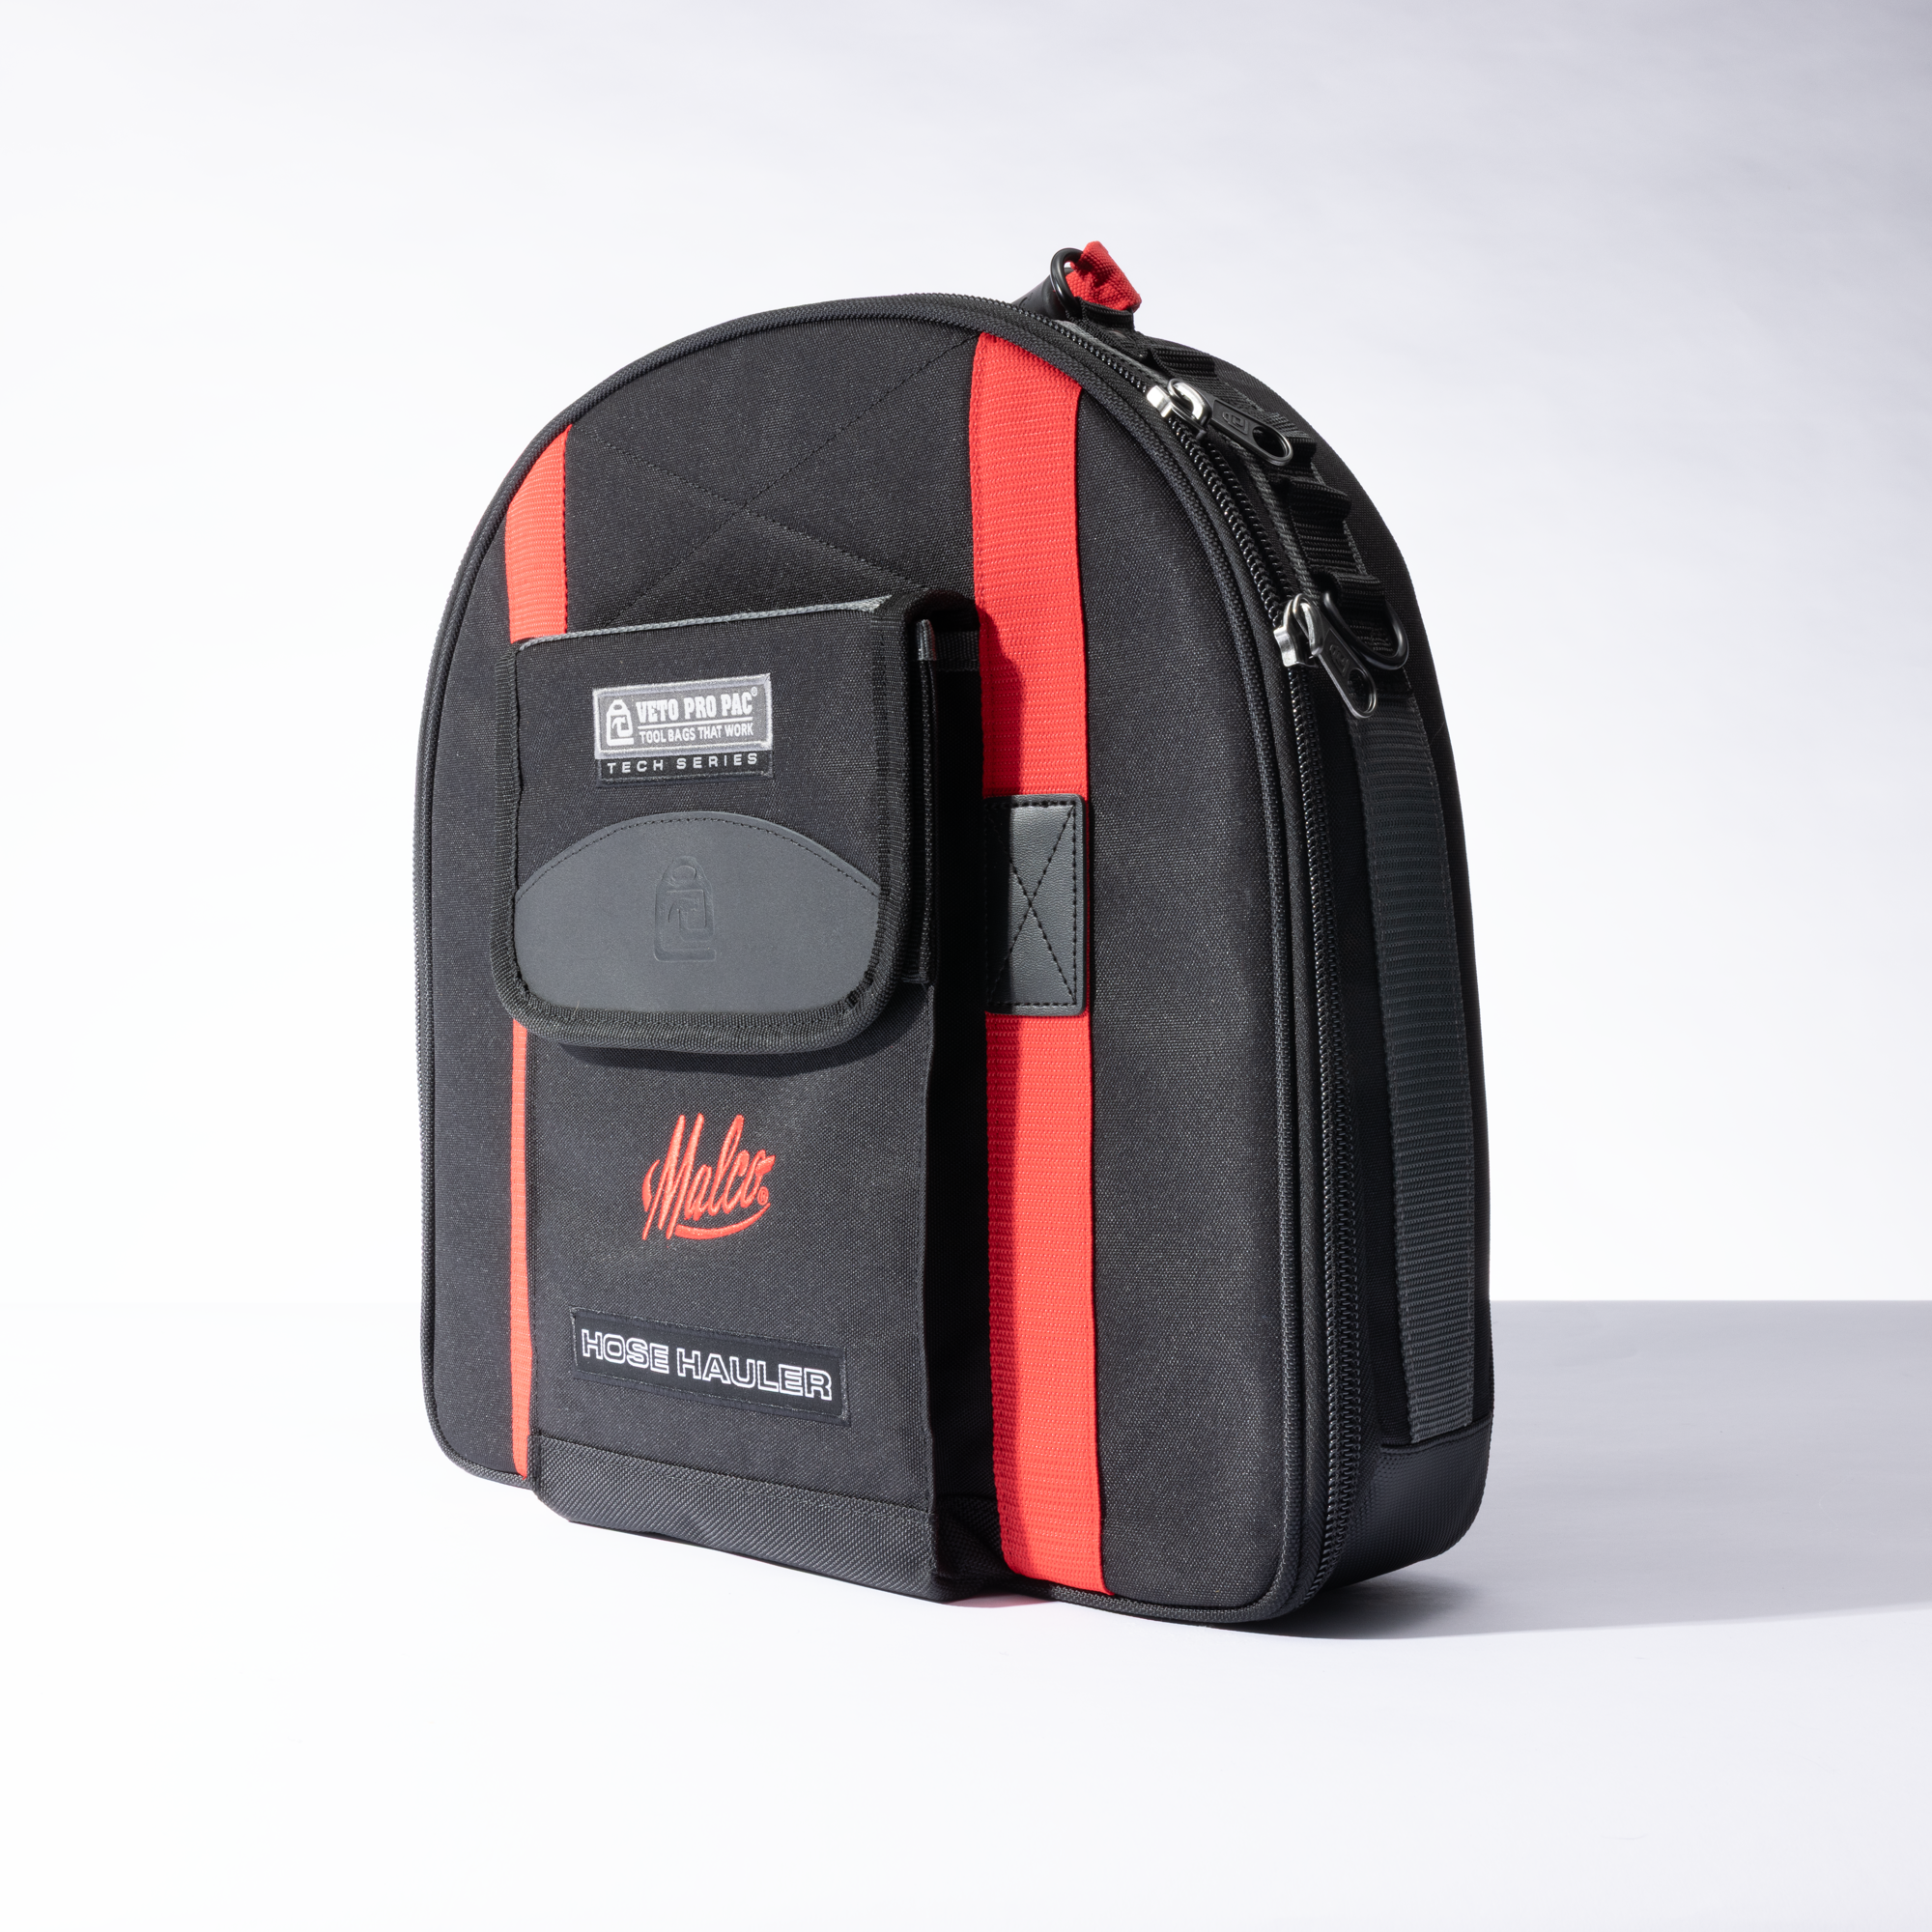
All components are packed in a Veto Pro Pac® Hose Hauler bag, built for jobsite durability and efficient transport. The bag features a water- and oil-resistant tarpaulin interior for easy cleanup, multiple storage pockets, removable dividers, and a removable interior pouch for flexible organization. Exterior MOLLE straps and D-rings provide additional attachment points, while a rugged base protects against wear in tough environments. With a 15 lb max payload and compact footprint, the bag keeps essential evacuation tools protected, organized, and ready to move.
The HHK1 Vacuum kit delivers a streamlined solution for evacuation setups—helping Trade Pros work more efficiently with fewer setup changes and better organization on every job.
Features
- Complete evacuation kit for residential systems. It includes a hose, core removal tool, and comes in a Premium Veto Bag for a ready-to-use setup
- TurboFlow™ High-Flow Hose – 3/8 in. ID supports faster evacuation and improved system performance, with durable SAE J2196 construction rated to 800 psi working pressure and 4000 psi burst
- CRT2Y High-Flow Core Removal Tool with integrated sight glass and dual valve control for efficient evacuation and system verification. Y-style design improves flow while allowing isolation of vacuum or micron gauges during service. Comes in a durable hard carry case for storage
- Premium Storage Solution – Veto Pro Pac® Hose Hauler keeps tools organized and protected, featuring a water/oil-resistant interior, reinforced base, and durable YKK® zippers
- Hose Hauler Bag Specifications:
Height (H): 17″” (43cm)
Width (W): 17″” (43cm)
Depth: 5″” (13cm)
Weight (empty): 4 lbs/1.8kg
Internal Volume (without internal pouch and dividers): 769 in. ³ /12.6 L
Max Payload: 15lbs/7kg - Kit Contents:
(1) TurboFlow™ Vacuum Hose – RH6014 (60 in., 3/8 in. ID, 3/8in x 1/4 in. SAE fittings)(1) High Flow Core Removal Tool Valve with Sight Glass – CRT27Y (1/4 in., 5/16 in. & 3/8 in.)(1) Veto Pro Pac® Hose Hauler Bag
FAQs
1 – Turbo Flow 60” 1/4 SAE x 3/8 SAE hose
1 – Dual-valve CRT with sight glass” Q: Where do I connect the CRT and hose to evacuate a system? A: The 3/8″ connector connects to the vacuum pump while the CRT and 1/4″ connector would attach to the high side (liquid line). This allows for air and non condensables to be removed from the system. A vacuum gauge should be connected to the accessory port on the CRT. Q: Is there a magnet to store the core removal stem after it is removed from the CRT? A: Yes, there is a magnet on the CRT core remover. Q: Is the core removal tools vacuum-rated? If so, what is the vacuum rating? A: The core removal tool is rated to 20 microns. Q: Are the core removal tools & high flow Y’s vacuum-rated? If so, what is the vacuum rating? A: The core removal tool and the high flow Y’s are rated to 20 microns. Q: Should I clean or flush my CRT between uses? If so, how do I clean it? A: We recommend using an ACE powerflush product to clean out if the tool has been exposed to lubricants or other contaminants such after servicing a system with a compressor has burned out. Refer to the instructions for the ACE powerflush product for guidance on how to flush these components. Q: Where can I get replacement parts for my CRT? (Core removal rod, spare gaskets, replacement valves, etc.) A: Please contact customer service. Q: I suspect my CRT is leaking, how can I test for this? A: To test a CRT: For this test you will need a vacuum pump, a digital vacuum gauge such as the DVG1, a vacuum hose such as the Turbo flow hoses, and an empty recovery tank. You may also need adapters to size the fittings and recovery tank ports appropriately. Always use known good test equipment to ensure you are testing the CRT, not your test equipment. 1. Close the valves on the evacuated, known-good recovery cylinder.
2. Attach the CRT to the vapor port of the recovery cylinder.
3. Attach the vacuum gauge to the accessory port on the CRT.
4. Connect the vacuum hose to the inline port of the CRT. Connect the other end of the vacuum hose to the vacuum pump.
5. Open the vapor port of the recovery cylinder.
6. Turn on the vacuum pump to start the test.
7. Draw down the system to 200 microns.
8. Close the inline and accessory valves half way. Allow the vacuum pump to draw the system back down to 200 microns. Fully open the accessory valve and inline valve on the CRT and wait 10-15 seconds. close the valves 1/2 way again and check that the vacuum pressure does not rise.
Note: If the vacuum pressure rises, repeat opening and partially closing the valves until the pressure does not rise.
9. Fully open the accessory valve and fully close the inline valve.
10. Turn off the vacuum pump and remove the vacuum hose.
11. Allow the system to rest for 15-20 minutes. The digital vacuum gauge should not rise above 500 microns.